Are you considering entering the world of online sales, but aren’t sure where to start? Look no further than Shopify, a leading ecommerce platform that empowers individuals and small businesses to launch their own stores with ease. Designed with beginners in mind, Shopify simplifies the digital storefront process, making it accessible for anyone eager to step into the ecmmerce arena. This guide will walk you through every step necessary to get your Shopify store up and running, from initial setup to making your first sale.
Whether you are a craft maker, a small business owner, or just starting out with your entrepreneurial journey, Shopify offers the tools and resources to support your venture’s growth. The platform is not only robust and user-friendly, but also versatile enough to handle anything from a handful of products to thousands of transactions. By following this step-by-step guide, you’ll learn the essentials of setting up your Shopify store, making the process as straightforward and successful as possible.
With the right guidance and a bit of effort, you’ll be ready to join the thriving community of Shopify merchants in no time. Remember, every successful store starts with a single step—and yours begins right here.
Getting Started with Shopify
Step 1: Sign Up and Explore the Free Trial
Embarking on your Shopify journey starts with a simple sign-up process. Here’s how to get your account ready:
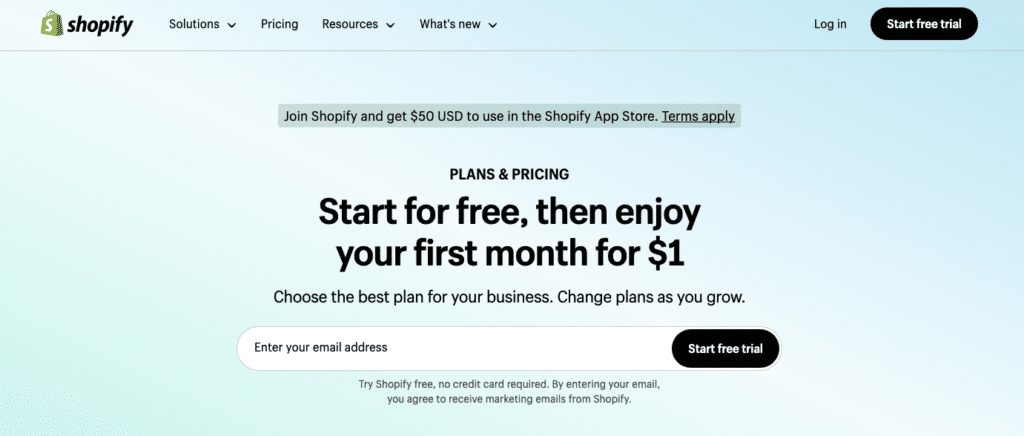
- Visit the Shopify website: Go directly to Shopify and click on the ‘Start free trial’ button. Shopify offers a 14-day free trial, allowing you to explore its features without immediate financial commitment.
- Create your account: Fill in your email address, choose a password, and select a unique name for your store. This name will be part of your temporary Shopify domain (e.g., yourstorename.myshopify.com).

Step 2: Familiarize Yourself with the Shopify Dashboard
Once you’ve set up your account, take the time to navigate through the Shopify dashboard. This is the command center for your online store, where you will manage products, see incoming orders, and track your overall performance. Key areas to focus on include:
- Home: Your daily to-do list and performance metrics are displayed here.
- Orders: View, manage, and analyze orders placed by your customers.
- Products: This is where you add items, manage inventory, and organize products into collections.
- Customers: Access customer details, order history, and contact information.
- Analytics: Get insights into your store’s traffic and sales.
- Marketing: Tools and campaigns to help promote your store.
Taking the time to familiarize yourself with these options inside the Shopify dashboard will streamline your store setup and ensure you’re making the most of what Shopify has to offer. Remember, the goal during the trial period is to get comfortable with the interface and prepare for a full launch.
In the next section, we’ll jump into planning your store, a critical step that involves deciding what products to sell and crafting a business plan tailored to your market.
Planning Your Store
Step 3: Develop a Business Plan

Before diving into the specifics of product selection and store aesthetics, it’s vital to establish a solid business plan. This plan will act as your roadmap, outlining your business objectives, target audience, and growth strategies. Here are key components to consider:
Business Objective: Define what you want to achieve with your Shopify store. Are you looking to supplement your income, or do you aspire to grow into a full-time business?
Target Market: Identify who your customers are. Understanding your audience’s demographics, preferences, and buying behaviors will guide your marketing strategies and product offerings.
Financial Planning: Set realistic budget expectations for initial investments, expected revenue, and ongoing expenses such as hosting fees, domain purchase, and marketing.
Step 4: Conduct Market Research
Determining what to sell is arguably one of the most challenging aspects of setting up a new business. Market research is crucial to ensure the products you choose will attract enough interest and sales to make your store viable.
- Analyze Trends: Use tools like Google Trends, social media, and market reports to identify trending products or niches that resonate with your target audience.
- Competitor Analysis: Look at other Shopify stores selling similar products. Note what they do well and where they fall short. This can help you find a unique angle for your store.
- Supplier Research: Once you have a product idea, research potential suppliers to ensure you can source quality products reliably and at a good price.
By the end of this planning phase, you should have a clear idea of what products you will sell, who your potential customers are, and how you will manage your store’s finances. These decisions are critical as they directly influence how you will set up and customize your Shopify store in the next steps.
Setting Up Your Store
Step 5: Choose and Customize Your Shopify Theme
Selecting the right theme is an important step as it forms the foundation of how your store looks and feels. Shopify offers a variety of themes, both free and paid, that are designed to cater to different industries and aesthetic preferences.
- Select a Theme: Browse the Shopify Theme Store and filter options based on your business type or desired features. Consider themes that are responsive, meaning they’ll look good on both desktop and mobile devices.
(Pro tip: It is a good idea to go with a paid theme over a free theme, unless you yourself or someone on your team is familiar with website coding. The reasoning behind this is that creators of paid themes will often offer better support options should you need it and are more likely to keep the theme up to date and inline and working with future Shopify updates.)
- Customize Your Theme: Once you’ve chosen a theme, customize it to match your brand. Shopify’s theme editor is user-friendly, allowing you to change colors, fonts, and layout elements without needing to code.
Step 6: Add Products to Your Store
With your theme set, it’s time to add products:
- Product Details: For each product, include a clear title, a detailed description, and high-quality images. The description should inform customers about the features and benefits of the product, helping them make a purchase decision. Don’t skimp on images. They can have a big impact on your sales.
- Pricing and Inventory: Set your prices and track inventory through Shopify’s built-in tools. Make sure to consider your costs and desired profit margins when setting prices.
- Categorization: Organize your products into collections (categories) to make it easier for customers to find them. For example, if you’re selling clothing, you might have collections like “Men’s,” “Women’s,” “Accessories,” etc.
Step 7: Setting Up Collections
Collections are essential for organizing your store’s offerings and improving user experience. They help customers find products within specific categories or themes, such as “new arrivals,” “sale items,” or “seasonal products.”
- Create Collections: In Shopify, you can set up automated collections that group products based on specific criteria (e.g., price, type, tag) or manual collections where you select each product individually.
- Manage Collections: Use the Shopify dashboard to manage and update your collections as your inventory changes and your store grows.
This section of the setup process not only makes your store appealing but also functional and easy to navigate. Proper attention to detail here can significantly impact the overall customer experience, encouraging repeat business and increasing sales.
Domain and Website Settings
Step 8: Establish Your Custom Domain
A custom domain is crucial for building brand credibility and making your store look professional. Shopify allows you to purchase a domain directly through the platform or you can connect a domain you already own.
- Purchase a Domain: Within the Shopify dashboard, navigate to ‘Online Store’ and then ‘Domains’. Here, you can search for available domain names related to your business and buy one directly.
(Pro tip: Although Shopify does offer this as an option, it is best to purchase your domain through another popular domain registrar such as GoDaddy or Namecheap. In the future, if you ever decide to migrate away from Shopify to another platform, this will make the transition easier.)
- Connect an Existing Domain: If you already own a domain through another registrar, Shopify provides easy-to-follow instructions on how to point it to your Shopify store.
Step 9: Optimize Your Shopify Store for SEO
SEO (Search Engine Optimization) is vital for ensuring that your store appears in search results when potential customers are looking for products you sell. Here are key elements to focus on:
- Page Titles and Descriptions: Make sure each page on your store has a unique title and description that includes relevant keywords. This helps search engines understand what your page is about and can improve search rankings.
- URL Structure: Use clear, descriptive URLs for your pages and products. Avoid long strings of numbers or characters.
- Image Alt Text: Add descriptive alt text to images, which helps search engines index your images and can bring traffic through Google Image Search.
- Implement a Clear Site Structure: An easy to use navigation menu as well as internal links within content between pages makes it easier for search engines to find all of your content. More importantly, it helps visitors to find what they are looking for on your site. Frustrated shoppers do not buy.
Search engine optimization is a massive topic on its own that would need many articles to fully cover, but implementing these SEO basics will get your store started on the right track. It will not only help customers find your store but also navigate through your products more easily, enhancing the overall user experience. You can check out our article about 7 Important SEO Tips For Your Shopify Store for a better understanding.
Payments and Checkout
Step 10: Setting Up Payment Gateways
One of the final steps before launching your Shopify store is to configure your payment gateways. Shopify supports various payment methods, including Shopify Payments, PayPal, and third-party providers, ensuring you can cater to a broad audience.
- Shopify Payments: This is Shopify’s own payment solution, which is straightforward to set up and allows you to accept credit card payments directly. It also integrates seamlessly with the rest of your Shopify functionalities.
- Third-Party Payment Providers: If you prefer, you can use external payment gateways like PayPal, Stripe, or others available in your region. Each provider may have different transaction fees and setup processes, so consider these factors when making your choice.
Step 11: Configuring Taxes and Shipping Settings
Accurate tax and shipping settings are crucial for providing clear pricing information and avoiding customer disputes.
Taxes: Shopify can automatically handle most common sales tax calculations. However, you should verify that the settings are correct for your specific location and adjust them if necessary.
Shipping: Setting up your shipping rates and methods is a critical step. You can offer various shipping options based on price, weight, or location. Also, consider whether to offer free shipping, which can be a powerful incentive for customers to make a purchase.
Testing Your Checkout Process
Before going live, conduct test transactions to ensure that the payment, taxes, and shipping settings work correctly. Shopify offers a “Bogus Gateway” for testing purposes, which simulates a payment provider without processing actual payments.
Ensuring these elements are correctly configured not only complies with legal requirements but also enhances customer trust and satisfaction by providing a smooth and transparent checkout experience. In the next section, we’ll discuss the final preparations to launch your store, focusing on making sure everything is in order and preparing to market your new online shop.
Shipping and Fulfillment
Step 12: Setting Up Shipping Options
Shipping is a critical aspect of your Shopify store as it directly affects customer satisfaction and repeat business. Here’s how to configure your shipping settings effectively:
- Define Shipping Zones: Shopify allows you to create specific zones based on geographic locations. This helps in setting different shipping rates and methods for customers in various areas, optimizing both cost and delivery times.
- Choose Shipping Rates: Decide whether to charge flat rates, use carrier-calculated shipping, or offer free shipping. Consider your margins and competition when deciding on your shipping strategy.
As you grow, you may start to see signs that it is time to outsource your Shopify order fulfillment.
Step 13: Introducing Order Fulfillment Services
As your store grows, managing inventory and shipping can become increasingly complex. Using third-party fulfillment services can streamline this process.

Here’s what you need to know:
- How Fulfillment Services Work: These services store your inventory in their warehouses. When an order is placed on your Shopify store, the fulfillment service is notified, they pack the product, and handle the shipping logistics directly to the customer.
- Benefits of Using Fulfillment Services: Utilizing a fulfillment partner can save you time and reduce overhead costs. It eliminates the need for your own storage space and simplifies the shipping process, allowing you to focus more on sales and less on logistics.
- Choosing a Fulfillment Partner: Select a partner based on factors like compatibility with your product types, cost-effectiveness, their reputation, and their ability to reach your primary customer base efficiently.
- Integration with Shopify: Most popular Shopify order fulfillment services easily integrate with Shopify, including ShipBuddies. This integration automates much of the order processing, from receiving an order to shipping it out. Setup typically involves installing an app from Shopify’s marketplace and linking it to your store with API keys provided by the fulfillment service.
Step 14: Implement Fulfillment Services
Once you’ve chosen a fulfillment partner, integrating them into your Shopify operation involves a few key steps:
- Install Any Necessary Software: Most fulfillment services use software that integrates directly with Shopify, facilitating real-time updates on inventory and shipping.
- Sync Your Inventory: Ensure that your product details and inventory levels are accurately synced between Shopify and the fulfillment service to avoid order discrepancies.
- Set Up Communication Channels: Establish clear communication protocols with your fulfillment partner to handle order changes, returns, or any issues that arise.
Implementing these shipping and fulfillment strategies will help ensure that your products reach your customers efficiently and safely, enhancing customer satisfaction and encouraging repeat business.
Shopify also has some fulfillment apps that can help your order fulfillment process.
Now is the exciting part. It’s time to launch your store!
Launching Your Store
Step 15: Final Checks Before Going Live
Before officially launching your Shopify store, it’s crucial to ensure that everything is set up correctly and ready for customers. Here are the final checks you should perform:
Test Orders: Place a few test orders to ensure that the checkout process is smooth and error-free. Check that payments go through as expected, shipping calculations are correct, and emails or notifications are sent appropriately.

Inventory Setup: Verify that all your products are correctly listed with accurate descriptions, prices, and stock levels. This prevents any issues with order fulfillment once you start receiving real orders.
Step 16: Marketing Your Store
With your store ready to go live, it’s time to attract customers. Effective marketing strategies are essential for drawing traffic to your new online shop.
- SEO: Optimize your store’s content and images for search engines to increase your visibility in search results.
- Social Media: Leverage social media platforms like Facebook, Instagram, and Pinterest to reach your target audience. Share engaging content, promote your products, and link directly to your Shopify store.
- Email Marketing: Build an email list and start sending out newsletters with promotions, new product announcements, or interesting content related to your niche.
Implementing these marketing efforts will help you build an initial customer base and start generating sales. Remember, the launch is just the beginning. Continuously analyze your performance and adjust your strategies as needed to grow your store.
Step 17: Go Live!
Once you’ve completed all the necessary checks and started your marketing efforts, it’s time to launch your store. Announce your grand opening across your marketing channels to create excitement and draw in customers.
Congratulations on setting up your Shopify store! As you move forward, keep an eye on customer feedback, monitor analytics, and continually optimize your store to better meet your customers’ needs. In the next section, we’ll discuss how to manage and optimize your store post-launch to ensure sustained growth and success.
Post-Launch: Managing and Optimizing Your Store
Step 18: Tracking and Analyzing Performance
After your Shopify store is up and running, it’s crucial to monitor its performance and make informed decisions based on data. Here’s how to effectively track and analyze your store’s performance:
- Analytics: Utilize Shopify’s built-in analytics tools to monitor sales trends, customer behavior, and other key performance indicators. Pay attention to metrics like conversion rate, average order value, and traffic sources to understand what’s working and what isn’t.
- Google Analytics: For a more comprehensive analysis, integrate Google Analytics with your Shopify store. This will provide deeper insights into user interactions, bounce rates, and specific pathways that customers take within your store.
Step 19: Regular Updates and Customer Engagement
Keeping your store updated and engaging with customers regularly are key components to maintaining interest and loyalty.
- Product Updates: Regularly update your inventory with new products, restock popular items, and consider seasonal offerings to keep your store fresh and relevant.
- Customer Service: Excellent customer service is vital for online businesses. Respond promptly to customer inquiries, resolve issues efficiently, and ensure your customers are satisfied with their purchases.
- Engagement Strategies: Use email marketing, social media, and content marketing to keep your audience engaged. Consider implementing loyalty programs, promotions, or exclusive offers for returning customers.
Step 20: Performance Optimization
As you gather more data on your store’s operation, start optimizing processes and marketing strategies to boost efficiency and profitability.
- A/B Testing: Experiment with different aspects of your store, such as product descriptions, pricing strategies, and marketing messages. A/B testing can help you find the most effective approaches that resonate with your audience.
- Site Speed Optimization: Ensure your Shopify store loads quickly on all devices to improve user experience and SEO rankings. Shopify provides tools to check your site speed and recommendations for improvements.
- Mobile Optimization: With an increasing number of consumers shopping on mobile devices, make sure your Shopify store is fully optimized for mobile. This includes having a responsive design and mobile-friendly checkout processes.
By continually managing and optimizing your store, you ensure that it remains competitive and continues to grow. This proactive approach is essential for adapting to changes in consumer behavior and market conditions.
Conclusion: Launching Your Journey with Shopify
Congratulations on setting up and launching your Shopify store! By following the steps outlined in this guide, you’ve laid a solid foundation for a successful online business. Whether you’re a hobbyist looking to turn a passion into a business or a small business owner expanding into the ecmmerce realm, Shopify provides the tools and support needed to thrive.
Recap of Key Steps:
- Getting Started: Signing up for Shopify and familiarizing yourself with the dashboard.
- Planning Your Store: Developing a business plan and conducting market research.
- Setting Up Your Store: Choosing a theme, adding products, and organizing them into collections.
- Establishing Your Domain: Setting up a custom domain to strengthen your brand’s presence.
- Optimizing for SEO: Ensuring your store is discoverable through search engine optimization.
- Setting Payments and Checkout: Configuring payment gateways and checkout processes.
- Shipping and Fulfillment: Choose your shipping and order fulfillment options.
- Marketing and Launch: Implementing marketing strategies and going live.
- Post-Launch Management: Tracking performance, engaging customers, and optimizing for growth.
As you continue on this exciting entrepreneurial path, remember that ecmmerce is a dynamic field that requires ongoing learning and adaptation. Stay proactive about learning new trends, listening to customer feedback, and tweaking your strategies to enhance user experience and sales.
Feel encouraged to experiment with new ideas, embrace the vibrant Shopify community for support, and leverage the wealth of resources Shopify offers to its merchants. Every step you take from here on out builds upon the strong start you’ve made today. Keep pushing forward, stay curious, and most importantly, enjoy the journey of growing your online store. Good luck, and happy selling!
Have more questions about selling on Shopify? Check out our frequently asked questions about selling on Shopify article.
And remember that ShipBuddies is here to help with all of your order fulfillment needs. Request a quote today.


